Painted walls can add beauty and elegance to any space, but over time, they can become subject to wear and tear. One common issue that homeowners face is chipped paint on walls. Whether it’s due to accidental bumps or poor paint quality, chipped paint can be an eyesore that needs immediate attention. In this comprehensive guide, we will walk you through the process of fixing chipped paint on walls, from understanding the causes to achieving a smooth and seamless finish. So, roll up your sleeves and let’s get started!
Understanding the Common Causes of Chipped Paint on Walls
Before diving into the process of fixing chipped paint on walls, it’s essential to understand what causes it in the first place. One of the most common causes is impact damage, such as accidentally hitting the wall with furniture or other objects. Other factors include poor paint adhesion due to inadequate surface preparation, temperature fluctuations, or moisture issues. By identifying the root cause, you can prevent future occurrences and ensure a long-lasting paint job.
Assessing the Extent of the Damage
Once you’ve identified the chipped areas on your walls, the next step is to assess the extent of the damage. Some chips may be small and localized, while others may be larger or cover a significant portion of the wall. It’s crucial to evaluate the severity of the chips to determine the appropriate course of action. Small chips can often be fixed with simple touch-ups, while larger ones may require more extensive repairs. Understanding the scope of the damage will help you plan your approach accordingly.

Tools and Materials Needed for Fixing Chipped Paint on Walls
To effectively fix chipped paint on walls, you’ll need a few essential tools and materials. Here’s a list of what you’ll need:
- Putty knife or scraper: Use this tool to remove loose or chipped paint from the wall surface.
- Sandpaper: Choose a medium-grit sandpaper to smooth out any rough edges after scraping the chipped paint.
- Spackling compound: This paste-like substance is used to fill in the gaps left by the chipped paint.
- Primer: Applying a coat of primer helps the new paint adhere better to the wall surface.
- Paintbrushes and rollers: These tools are necessary for applying the e primer and paint.
- Paint: Select a high-quality paint that matches the color and finish of your existing wall paint.
Make sure to gather all the necessary tools and materials before starting the repair process to ensure a smooth workflow.
Step-by-Step Guide to Fixing Chipped Paint on Walls
Now that you have everything you need let’s dive into the step-by-step process of fixing chipped paint on walls:
- Prepare the area: Start by protecting the surrounding area with drop cloths or masking tape to prevent any accidental damage.
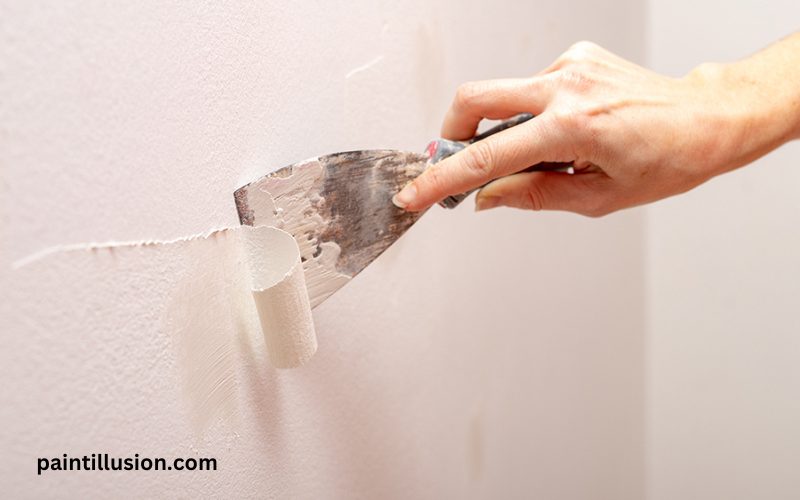
- Remove loose paint: Use a putty knife or scraper to carefully remove any loose or chipped d paint from the wall surface. Be gentle to avoid causing further damage.
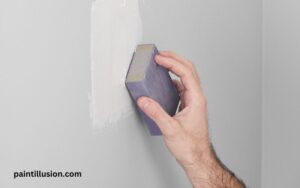
- Smooth the edges: After removing the loose paint, use sandpaper to smooth out any rough edges around the chipped area. This will ensure a seamless finish once the repair is complete.
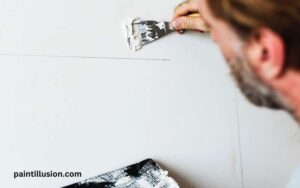
- Apply spackling compound: Take a small amount of spackling compound on your putty knife and apply it evenly over the chipped area. Use smooth, sweeping motions to create a flat surface. Allow it to dry according to the manufacturer’s instructions.
- Sand the repaired area: Once the spackling compound is dry, use sandpaper to smooth the repaired area until it blends in seamlessly with the surrounding wall.
- Prime the repaired area: Apply a coat of primer to the repaired area to ensure proper paint adhesion. Allow the primer to dry completely before moving on to the next step.
- Paint the repaired area: Finally, apply the matching paint color to the repaired area using a brush or roller. Use light, even strokes to achieve a seamless look. Allow the paint to dry completely before assessing if a second coat is needed.
Tips for Achieving a Smooth and Seamless Finish
Fixing chipped paint on walls requires attention to detail to achieve a smooth and seamless finish. Here are some tips to help you achieve professional-looking results:
- Choose the right paint: Ensure that the paint you use for touch-ups matches the existing wall color and finish. This will help the repaired area blend in seamlessly.
- Blend the edges: When applying the spackling compound and paint, feather the edges to blend them with the surrounding wall. This will create a more natural and cohesive look.
- Allow for proper drying time: Follow the manufacturer’s instructions for drying time between each step. Rushing the process can result in subpar results and may require you to start over.
- Use light coats: When applying paint, it’s better to use multiple light coats rather than one heavy coat. This will prevent the repaired area from standing out and ensure a consistent finish.

Preventive Measures to Avoid Future Chipped Paint Issues
While fixing chipped paint on walls is a necessary task, taking preventive measures can help you avoid future issues. Here are some preventive measures you can take:
- Proper surface preparation: Before painting, make sure to clean the walls thoroughly and remove any loose or flaking paint. This will ensure better paint adhesion and minimize the risk of chipping.
- Use high-quality paint: Investing in high-quality paint can make a significant difference in the durability and longevity of your paint job. Quality paint is less likely to chip or peel.
- Avoid impact damage: Be cautious when moving furniture or other objects near walls. Accidental bumps can cause chipped paint. Consider using furniture pads or wall protectors to minimize the risk of damage.
By implementing these preventive measures, you can extend the lifespan of your paint job and reduce the need for frequent touch-ups.
Hiring Professional Help for Extensive or Complex Chipped Paint Problems
If the chipped paint issue is extensive or complex, it may be best to seek professional help. Professional painters have the necessary skills, experience, and tools to handle more significant repairs. They can assess the damage, recommend the best course of action, and provide a seamless finish that matches your existing wall paint. Don’t hesitate to reach out to professionals if you feel the task is beyond your capabilities.
Common Mistakes to Avoid When Fixing Chipped Paint on Walls
While fixing chipped paint on walls may seem like a straightforward task, there are some common mistakes to avoid. These mistakes can lead to subpar results or even cause further damage to your walls. Here are a few pitfalls to watch out for:
- Skipping surface preparation: Failing to properly clean and prepare the surface before repairing can result in poor paint adhesion and a less durable finish.
- Using the wrong paint color or finish: Choosing a paint color or finish that doesn’t match your existing wall can make the repair stand out and look unprofessional.
- Applying too much pressure: When scraping or sanding, applying excessive pressure can damage the wall surface and create more problems.
- Not allowing for proper drying time: Rushing through the process and not allowing adequate drying time between each step can lead to subpar results and a less durable finish.
By avoiding these common mistakes, you can ensure a successful paint repair and achieve professional-looking results.
Alternative Solutions for Covering Up or Disguising Chipped Paint
If you’re looking for alternative solutions to cover up or disguise chipped paint on walls, there are a few options you can consider:
- Wallpaper: Applying wallpaper over the chipped areas can instantly transform the look of your walls and hide any imperfections.
- Textured finishes: Textured finishes, such as faux painting techniques or applying textured wallpaper, can help mask chipped paint and add visual interest to your walls.
- Accent walls: Creating an accent wall with a different paint color or pattern can divert attention from the chipped areas and create a focal point in the room.
These alternative solutions can provide a quick fix for chipped paint issues while adding a unique touch to your space.
Conclusion
Fixing chipped paint on walls may seem like a daunting task, but with the right knowledge and tools, it’s a task that can be easily accomplished. By understanding the causes, assessing the damage, and following the step-by-step guide provided in this article, you can achieve a seamless and professional-looking finish. Remember to take preventive measures to avoid future chipped paint issues and don’t hesitate to seek professional help for more extensive or complex repairs. With a little patience and attention to detail, your walls will regain their beauty and charm in no time. So, roll up your sleeves, grab your tools, and give your walls the love they deserve!
CTA: Ready to fix those chipped paint on your walls? Follow our step-by-step guide and achieve a seamless finish. Don’t forget to share your before and after pictures with us!


What i don’t understood is in truth how you are not actually a lot more smartly-liked than you might be right now. You are so intelligent. You realize therefore significantly when it comes to this matter, produced me personally believe it from a lot of varied angles. Its like men and women don’t seem to be involved unless it is something to accomplish with Woman gaga! Your personal stuffs outstanding. Always care for it up!