
To spray trim after walls are painted, it is recommended to tape off the walls to protect them, then use an airless paint sprayer to spray the trim. The trim should be sprayed before any touch-up work is done on the walls.
Gather The Necessary Supplies
To successfully spray trim after walls are painted, gather all the necessary supplies including an airless paint sprayer, tape, drop cloth, and high-quality semi-gloss paint. Prepare the trim by cleaning and repairing any imperfections before applying a coat of paint, ensuring a professional and polished finish.
Paint Sprayer
A high-quality paint sprayer is essential when it comes to spraying trim after walls are painted. Investing in a good paint sprayer will ensure a smooth and even application, giving your trim a professional finish. Look for a sprayer with adjustable settings and a wide spray pattern to cover larger areas efficiently.
Paint
Choosing the right paint for your trim is crucial for achieving great results. Opt for a paint specifically designed for trim, such as a high-quality latex or enamel paint. These paints are durable and easy to clean, making them ideal for trim that often gets touched or bumped. Pick a color that complements your walls and the overall aesthetic of the room.
Painter’s Tape
Painter’s tape is an essential tool for achieving clean, crisp lines when spraying trim. Use painter’s tape to mask off areas that you don’t want to be painted, such as the walls adjacent to the trim. Make sure to press the tape firmly onto the surface to prevent any paint from seeping under it. Remove the tape carefully once the paint is dry to avoid any peeling.
Drop Cloths
To protect your floor and furniture from any stray paint droplets, lay down drop cloths or plastic sheeting in the area where you’ll be spraying trim. Secure the drop cloths in place to prevent any shifting or movement during the painting process. This will save you a lot of time and effort in cleaning up afterward.
Sandpaper
Before spraying the trim, it’s essential to prepare the surface properly. Use sandpaper to smooth out any rough spots or imperfections on the trim. This step ensures that the paint adheres well and results in a flawless finish. Start with a coarser-grit sandpaper and gradually move to a finer-grit for a smooth surface.
Cleaning Supplies
Properly cleaning the trim before painting is crucial for achieving a long-lasting and professional-looking finish. Gather cleaning supplies such as a mild detergent, sponge or cloth, and water. Remove any dirt, dust, or grime from the trim, making sure it’s completely clean and dry before applying paint.
Clean And Prep The Trim
To clean and prep the trim before spraying, start by taping off the edges and laying down a drop cloth. Repair any holes or cracks, then prime and paint your trim. Remove the tape and enjoy your freshly painted trim.
Remove Any Dirt, Dust, Or Grime From The Trim
To achieve a smooth and flawless finish when spraying trim after walls are painted, it is crucial to start with a clean and prepped surface. Begin by removing any dirt, dust, or grime from the trim. This can be done by using a slightly damp cloth or sponge and gently wiping down the surface. Pay attention to corners, crevices, and any other hard-to-reach areas to ensure that all dirt is removed.
Use Sandpaper To Smooth Out Any Rough Areas
After removing the surface dirt, take a closer look at the trim for any rough areas or imperfections. These can be easily smoothed out using sandpaper. Choose a fine-grit sandpaper and gently sand the rough spots until they become smooth to the touch. This step is important as it creates an even surface for the paint to adhere to and helps achieve a professional result.
Wipe Down The Trim To Ensure It Is Clean And Dry
Once you’ve finished sanding the trim, it’s essential to wipe it down again to remove any dust or debris caused by sanding. Use a clean, dry cloth to thoroughly wipe down the trim, ensuring that no dust particles remain. This step is crucial as any remaining particles can interfere with the paint application and result in an uneven finish.
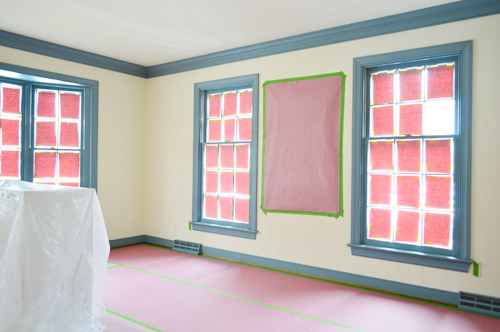
Apply Painter’s Tape To Protect Surrounding Areas
Before starting the spraying process, it is important to protect the surrounding areas from overspray. Apply painter’s tape along the edges of any adjacent surfaces, such as walls or floors, that you want to keep paint-free. This will create clean and crisp lines once the project is completed. Make sure the tape is pressed firmly against the trim to prevent any paint from seeping underneath.
By following these steps to clean and prep the trim before spraying, you’ll ensure a smooth and professional-looking finish. Taking the time to remove dirt, smooth any rough areas, wipe down thoroughly, and apply painter’s tape will result in a trim that looks seamlessly integrated with the newly painted walls.
Spraying Techniques
To achieve a professional finish when painting trim after walls, consider using spraying techniques for a smooth and uniform application. Start by masking the walls to protect them from overspray, then use an airless paint sprayer to quickly and efficiently spray the trim.
Remember to apply primer and allow it to dry before painting for better adhesion and durability.
Hold The Sprayer At A Consistent Distance From The Trim
When it comes to spraying techniques, one important aspect to consider is maintaining a consistent distance between the sprayer and the trim. This ensures an even coverage and prevents any patchy or uneven areas. Ideally, hold the sprayer about 6 to 8 inches away from the trim. This distance allows the paint to be evenly distributed without creating excessive buildup or drips. Remember to adjust the distance as needed depending on the type of sprayer and the specific trim being painted.
Move The Sprayer In Smooth, Even Strokes
To achieve a professional-looking finish, it is essential to move the sprayer in smooth, even strokes. This technique helps to distribute the paint evenly and minimizes the risk of streaks or lines on the trim. Start at one end of the trim and work your way to the other end, maintaining a consistent speed and pressure. Avoid stopping or hesitating mid-stroke, as this can result in an uneven application. By moving the sprayer in deliberate, controlled strokes, you can ensure a smooth and uniform finish on the trim.
Avoid Spraying Too Much Paint At Once To Prevent Drips And Runs
When spraying trim, it is essential to avoid applying too much paint at once. This helps prevent drips, runs, and smudges that can ruin the finish. Instead, opt for multiple light coats of paint, allowing each coat to dry before applying the next. This ensures a smooth and flawless surface on the trim. Additionally, pay attention to the paint’s viscosity and adjust the spraying technique accordingly. Thicker paints may require slower and more deliberate strokes, while thinner paints may necessitate faster and lighter applications. Remember, patience is key when it comes to achieving a professional look on your painted trim.
Overlapping And Coverage
When it comes to spraying trim after walls are painted, it is important to ensure proper overlapping and coverage. This ensures that the trim is evenly coated and matches the walls seamlessly. Follow these guidelines to achieve a professional finish.
Ensure Complete Coverage By Overlapping Each Pass
When spraying trim after walls are painted, it’s important to ensure complete coverage for a professional-looking finish. One way to achieve this is by overlapping each pass with the paint sprayer. This means that as you move the sprayer along the trim, the edges of each painted area should overlap slightly with the previous one.
This technique helps to prevent any gaps or uneven patches, ensuring that the paint covers the entire surface of the trim. It also helps to blend the paint seamlessly, creating a smooth and consistent finish.
Pay Attention To Corners And Edges For Even Coverage
In addition to overlapping each pass, it’s crucial to pay special attention to corners and edges when spraying trim. These areas can be more challenging to cover evenly, so taking the time to focus on them will result in a more professional-looking outcome.
When spraying corners, aim the sprayer directly at the corner, making sure to fully coat both sides. For edges, hold the sprayer at a slight angle to ensure that the paint reaches both the front and the side of the trim, providing complete coverage.
Remember, corners and edges are often more visible, so paying extra attention to these areas will enhance the overall look and quality of your painted trim.
Allow The Paint To Dry Between Coats As Recommended By The Manufacturer
Another important factor to consider when spraying trim after walls are painted is allowing the paint to dry between coats. This step is vital to achieve a flawless finish and prevent any drips, runs, or smudges.
Check the paint manufacturer’s instructions for the recommended drying time between coats, as it may vary depending on the type of paint used. Typically, it is best to wait for the first coat to dry completely before applying additional coats.
By following the recommended drying times, you ensure that each coat has sufficient time to adhere to the trim properly, resulting in a durable and long-lasting finish.
Test Spray On A Sample Piece
In order to achieve the desired finish when spray painting trim, it is important to test the paint and technique on a small piece of trim or cardboard before spraying the entire trim. This step allows you to adjust your technique if needed and ensure you are able to achieve the desired results. Testing on a sample piece also helps to prevent any potential mistakes or damage to the trim.
Before Spraying The Entire Trim, Test The Paint And Technique On A Small Piece Of Trim Or Cardboard
The first step in spray painting trim after walls are painted is to test the paint and technique on a small piece of trim or cardboard. This is essential because it allows you to see how the paint performs, how it adheres to the surface, and how it dries. It also gives you a chance to adjust your spraying technique if needed before tackling the entire trim. It’s crucial to ensure that the paint and technique you choose provide the desired finish for your trim.
Testing on a small piece of trim or cardboard also allows you to experiment with different paint colors, sheen levels, and even different types of spray equipment. This way, you can ensure that you’ve found the perfect combination for your trim and that it matches the overall aesthetic of the room.
Adjust Your Technique If Needed To Achieve The Desired Finish
Once you’ve tested the paint and technique on a small piece of trim, it’s time to evaluate the results and make any necessary adjustments. Pay close attention to the finish and coverage achieved during the test spray, and compare it to the desired finish you have in mind. If the results are not what you were expecting or if any areas require improvement, it may be necessary to adjust your spraying technique.
Common adjustments include altering the distance at which you hold the spray gun from the trim, adjusting the pressure of the sprayer, or modifying the speed at which you move the spray gun. These changes can have a significant impact on the outcome, so it’s important to experiment and find the right technique that allows you to achieve the desired finish.
By testing the paint and technique on a small piece of trim before spraying the entire trim, you can avoid any potential mistakes or mishaps that could ruin the finish. This step allows you to make any necessary adjustments to your technique, ensuring that you achieve the desired results and a flawless finish on your trim.
Work In Sections
When spraying trim after walls are painted, it is important to work in sections. This allows for better control and precision while ensuring an even coat of paint on the trim.
Divide The Trim Into Manageable Sections To Ensure Thorough And Efficient Spraying
When it comes to spraying trim after walls are painted, it’s essential to work in sections. This approach ensures thorough and efficient painting, allowing for consistent coverage and a professional finish. By dividing the trim into manageable sections, you can focus on one area at a time, giving your full attention to detail and reducing the risk of overspray or missed spots.
Complete One Section Before Moving On To The Next
Instead of trying to tackle the entire trim in one go, it is recommended to complete one section before moving on to the next. Whether you’re working on baseboards, crown molding, or window frames, taking this step-by-step approach ensures that each area receives the necessary attention it deserves. By working systematically, you can carefully cover the trim from top to bottom, ensuring consistent spray coverage and a seamless finish.
Benefits Of Working In Sections
There are several benefits to working in sections when spraying trim. Firstly, it allows for better control and precision. By focusing on one area at a time, you can pay close attention to detail, ensuring that every nook and cranny is adequately covered. Secondly, working in sections helps prevent overspray onto walls or flooring, as you can easily protect the surrounding areas with masking tape and drop cloths. Lastly, this approach enables you to work more efficiently, as you can easily track your progress and ensure consistent coverage throughout.
Ensuring Thorough Coverage
To ensure thorough coverage, it’s essential to follow a systematic approach when working in sections. Start by masking off any surrounding areas with masking tape and plastic sheeting to prevent overspray onto walls or flooring. Then, using a steady and controlled motion, apply a smooth and even coat of paint to the section of trim you are working on. Be sure to overlap each pass slightly to guarantee consistent coverage. Repeat this process for each section until all trim is painted, ensuring that no spots are missed.
Cleaning And Maintenance
Once you have completed the painting process, it’s important to clean your spray equipment thoroughly. Proper cleaning ensures that your equipment remains in good condition and ready for future use. Follow the manufacturer’s instructions for cleaning your paint sprayer, including disassembling and rinsing all parts. It’s also a good idea to inspect the spray tips and replace them if needed to ensure optimal performance for future projects.
To sum up, when spray painting trim after walls are painted, dividing the trim into manageable sections is crucial. This approach allows for better control, and precision, and ensures thorough and efficient coverage. By completing one section before moving on to the next, you can achieve a professional finish while reducing the risk of overspray or missed spots. Follow a systematic approach, protect surrounding areas, and clean your equipment properly to maintain its longevity.
Cleaning The Sprayer
To effectively spray trim after painting walls, start by carefully cleaning the sprayer. This ensures optimal performance and prevents any paint residue from affecting the trim’s appearance.
Follow The Manufacturer’s Instructions For Cleaning The Paint Sprayer
Proper maintenance and cleaning of your paint sprayer is essential to ensure its longevity and optimal performance. Following the manufacturer’s instructions is crucial in this process. Each paint sprayer model may have specific cleaning techniques and requirements, so it’s important to consult the user manual for accurate instructions.
Generally, cleaning a paint sprayer involves disassembling the components, flushing out any leftover paint or cleaning solution, and cleaning each part thoroughly. This helps remove any residual paint or debris that could clog the sprayer or affect the quality of your spray.
Properly Dispose Of Any Leftover Paint Or Cleaning Materials
When cleaning your paint sprayer, it’s important to responsibly dispose of any leftover paint or cleaning materials. Proper disposal not only helps protect the environment but also complies with local regulations and guidelines.
- Check with your local waste management facilities to understand the proper methods for disposing of paint and cleaning materials. Some areas may have designated drop-off locations or recycling programs for paint and other hazardous materials.
- Empty any remaining paint from the sprayer and store it in a suitable container for future use or disposal.
- Unused paint can be donated to local community organizations, schools, or nonprofits that may have use for it.
- For cleaning materials, such as solvents or cleaning solutions, follow the manufacturer’s instructions for proper disposal. Do not pour them down the drain or throw them in the trash.
By adhering to these disposal guidelines, you can ensure that you are doing your part to protect the environment and maintain a clean and safe working space.
Proper Storage
When it comes to completing a painting project, it’s important to not only focus on the quality of the work but also on preserving the tools and materials for future use. Properly storing your paint sprayer and any leftover paint is essential to ensure their longevity and effectiveness. Here are some tips to help you store your paint sprayer and leftover paint in a cool, dry place:
Store The Paint Sprayer And Any Leftover Paint In A Cool, Dry Place
After you have finished using your paint sprayer, it is crucial to store it in a cool and dry place. This will prevent any moisture or heat from affecting the components of the sprayer, which can lead to damage or malfunction. Look for a storage area that is away from direct sunlight and has good ventilation to maintain an optimal environment for your paint sprayer.
Ensure All Components Are Properly Secured And Protected
Before storing your paint sprayer, ensure that all components, including the spray gun, hoses, and nozzles, are properly secured and protected. This will prevent any damage or loss of parts while in storage. Consider using protective covers or cases specifically designed for paint sprayer equipment to provide an extra layer of protection. Storing the components in an organized manner will also make it easier to locate and use them when needed in the future.
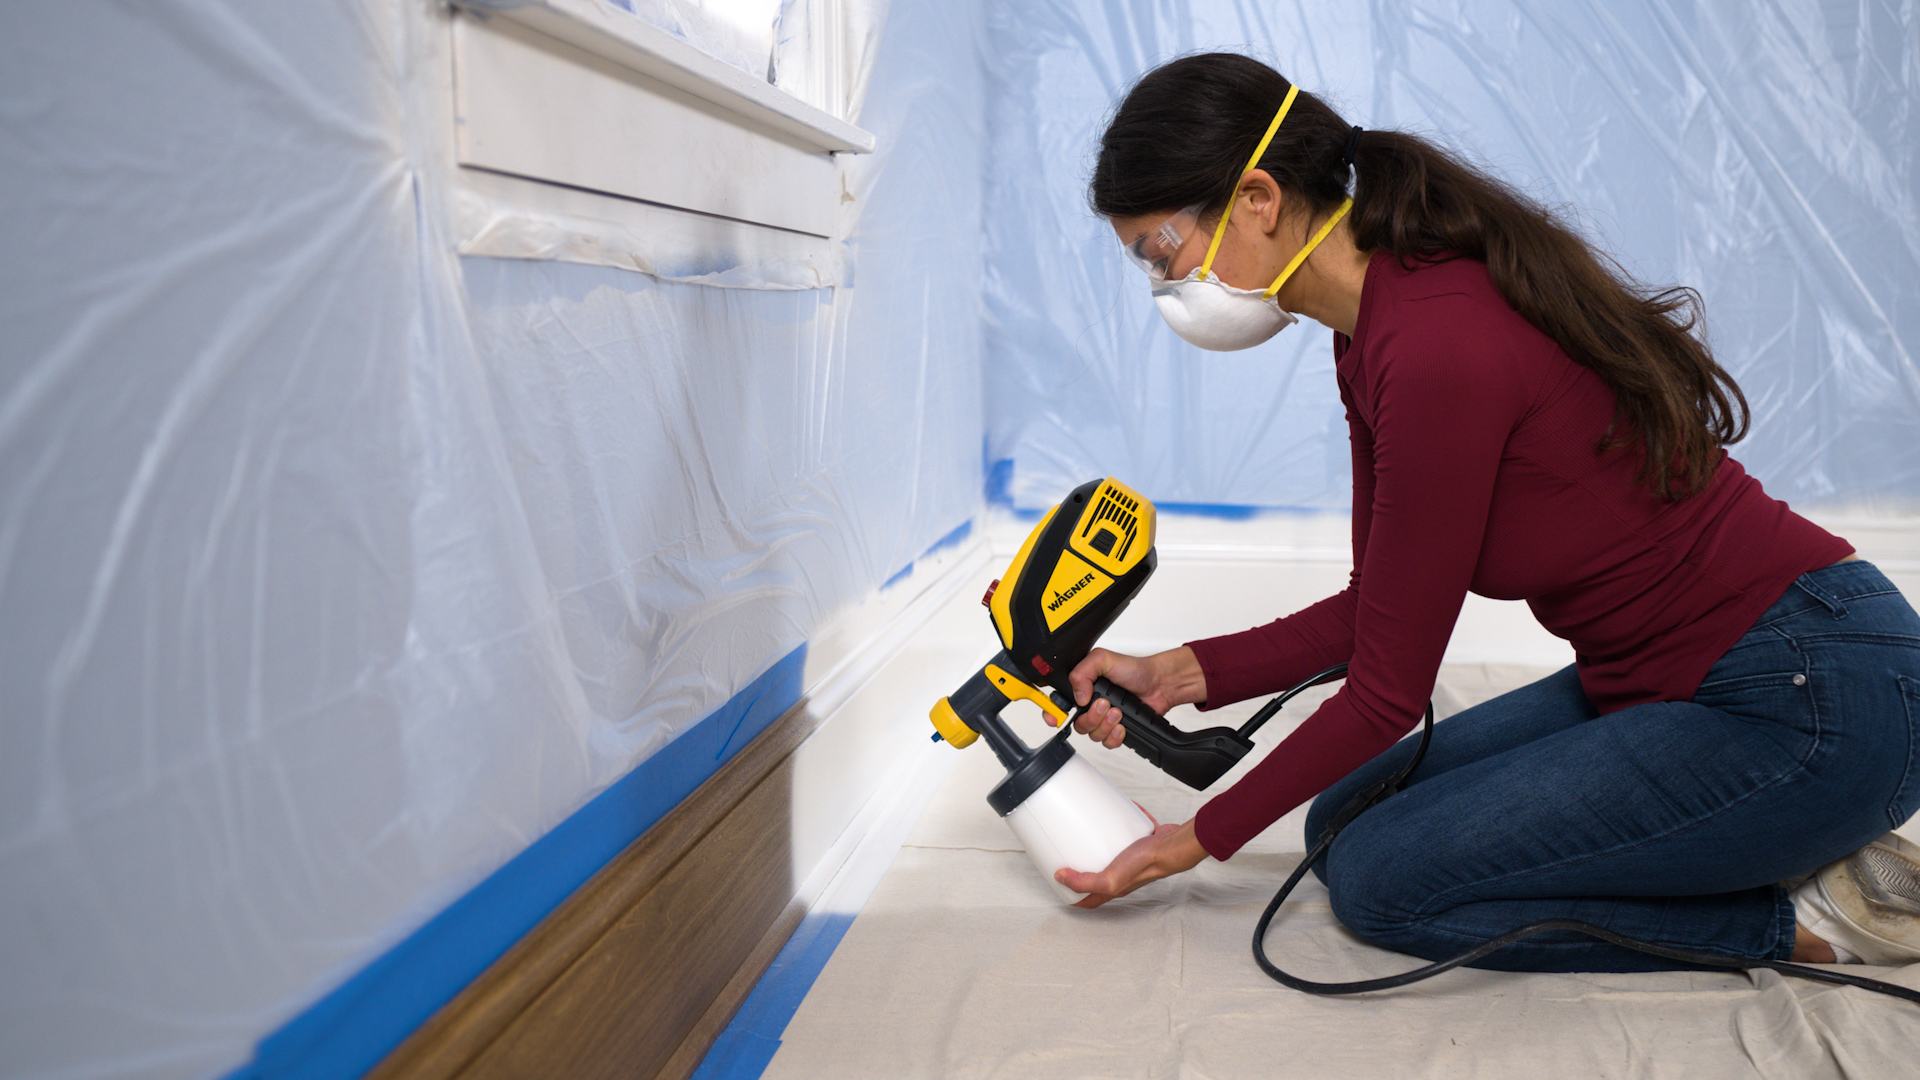
Credit: www.wagnerspraytech.com
Frequently Asked Questions Of How To Spray Trim After Walls Are Painted
Should I Spray Trim Or Walls First?
Spray the trim first if you’re using a paint sprayer. If you’re hand painting, start with the walls. It’s recommended to paint the trim before the walls. Use high-quality semi-gloss paint for the trim and baseboards. Clean, tape, prime, repair, and then paint the trim for a cleaner-looking home. No need to mask the walls when spraying the trim.
How Do You Paint Trim Then Walls?
For the best results, it is recommended to paint the trim before the walls. Start by painting the trim using high-quality semi-gloss paint. Once the trim is dry, tape it off and proceed to paint the walls. This method helps protect the wood and leaves a pleasing shine on the trim and baseboards.
How Do You Paint Trim That Is Already Painted?
To paint trim that is already painted, follow these steps: 1. Clean the trim and tape off the edges. 2. Use a primer on the trim to ensure proper adhesion. 3. Repair any holes or cracks in the trim. 4. Paint the trim using a brush or roller. 5. Remove the tape and admire your freshly painted trim.
Do You Have To Mask Walls When Spraying Trim?
When spraying trim, it is necessary to mask the walls with plastic sheeting and masking tape. The tape is applied to the edges of the trim, and the plastic sheeting is then attached to the tape, extending beyond the trim. This ensures that the walls are protected from overspray.
Conclusion
When it comes to spray painting trim after walls are painted, there are a few key steps to ensure a professional finish. First, make sure to properly prepare the trim by cleaning and sanding it. Next, protect the walls and surrounding areas by masking them off with tape and drop cloths.
Using a high-quality trim sprayer, apply thin and even coats of paint, allowing each coat to dry before applying the next. Finally, remove the tape and admire the beautifully painted trim that adds the perfect finishing touch to a freshly painted room.
Cool blog! Is your theme custom made or did you download it from somewhere? A design like yours with a few simple adjustements would really make my blog jump out. Please let me know where you got your theme. Thanks