
Oil painting is a beautiful and versatile medium that allows artists to create stunning masterpieces. However, one downside of working with oil paint is the cleanup process. Properly rinsing your oil paint brushes is essential to maintain their quality and longevity. In this comprehensive guide, we will discuss why it is important to rinse oil paint brushes, the materials needed for the process, a step-by-step guide on how to rinse them, tips for maintaining and preserving your brushes, common mistakes to avoid, alternative cleaning methods, how to properly store your brushes after rinsing, recommended products, and frequently asked questions.
Why is it Important to Rinse Oil Paint Brushes?
Rinsing your oil paint brushes is crucial for several reasons. Firstly, it helps to remove excess paint from the bristles, preventing the buildup of dried paint, which can lead to a stiff brush and affect your painting technique. Secondly, rinsing your brushes thoroughly helps to remove any remaining solvents or mediums that can contaminate your fresh paint and alter its properties. Lastly, by properly rinsing your brushes, you ensure that they stay in optimal condition, allowing you to use them for years to come.
Materials Needed for Rinsing Oil Paint Brushes
Before diving into the step-by-step guide, let’s gather the necessary materials for rinsing oil paint brushes. You will need:
- A sink or basin with warm water
- Mild liquid soap or brush cleaner
- Paper towels or a clean cloth
- A brush comb or your fingers
- Optional: a brush spinner or spinner attachment for a power drill
Having these materials ready will make the process more efficient and help you achieve the best results.
Step-by-Step Guide on Rinsing Oil Paint Brushes
Now, let’s walk through the process of rinsing your oil paint brushes:
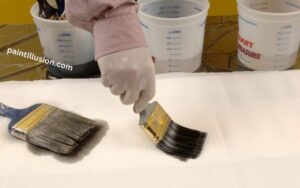
- Begin by wiping off excess paint from your brushes using a paper towel or clean cloth. Gently squeeze and shape the bristles to remove as much paint as possible.
- Fill a sink or basin with warm water. Avoid using hot water, as it can damage the brushes’ bristles. The water should be enough to submerge the bristles without touching the ferrule (the metal part that holds the bristles together).
- Add a small amount of mild liquid soap or brush cleaner to the water. Swirl the water gently to create a soapy mixture.
- Hold your brush by the handle and swirl it in the soapy water. Make sure the bristles are fully submerged. Gently agitate the brush to loosen any paint residue.
- After a few minutes of swirling, remove the brush from the soapy water and rinse it under running warm water. Continue rinsing until the water runs clear and there are no traces of paint or soap left.
- Once the brush is clean, gently squeeze out excess water using your fingers or a clean cloth. Avoid pulling or twisting the bristles, as this can damage them.
- Use a brush comb or your fingers to reshape the bristles to their original form. Start from the ferrule and work your way down to the tip of the bristles.
- If you have a brush spinner or spinner attachment for a power drill, you can use it to spin the brush and remove excess water more quickly. This step is optional but can be beneficial if you frequently paint and need your brushes to dry faster.
- Finally, lay your brushes flat on a clean cloth or paper towels to air dry. Avoid standing them upright, as water can seep into the ferrule and loosen the bristles.
Following these steps will ensure that your oil paint brushes are thoroughly cleaned and ready for your next painting session.
Tips for Maintaining and Preserving Oil Paint Brushes
Proper maintenance and preservation of your oil paint brushes are essential for their longevity. Here are some tips to help you take care of your brushes:
- Clean your brushes immediately after each painting session. Leaving paint to dry on the bristles can be difficult to remove and may damage the brush.
- Avoid using harsh solvents or cleaning agents, as they can deteriorate the bristles and affect their performance. Stick to mild soap or brush cleaners specifically designed for oil paint brushes.
- Store your brushes in a well-ventilated area with the bristles facing upward or lying flat. Avoid storing them in airtight containers or with the bristles touching each other, as it can cause deformation.
- Regularly inspect your brushes for any signs of damage or wear. If you notice frayed bristles or a loose ferrule, it may be time to replace the brush.
By following these tips, you can extend the lifespan of your oil paint brushes and ensure they remain in excellent condition for years to come.
Common Mistakes to Avoid When Rinsing Oil Paint Brushes
While rinsing oil paint brushes may seem straightforward, there are some common mistakes that artists make. Here are a few pitfalls to avoid:
- Using hot water: Hot water can damage the bristles and cause them to lose their shape. Stick to warm water for rinsing your brushes.
- Brushing too vigorously: Aggressively scrubbing the bristles can lead to fraying or breakage. Be gentle when swirling or agitating the brush in the water.
- Neglecting to remove excess paint: Failure to wipe off excess paint before rinsing can result in a messier and less effective cleaning process. Take the time to remove as much paint as possible before proceeding with rinsing.
- Storing brushes incorrectly: Storing your brushes upright or with the bristles touching each other can cause deformation and damage. Always lay them flat or with the bristles facing upward.
By avoiding these common mistakes, you can ensure that your oil paint brushes remain in optimal condition and perform at their best.
Alternative Methods for Cleaning Oil Paint Brushes
While the step-by-step guide mentioned above is the most common and effective way to clean oil paint brushes, there are alternative methods you can try. Here are a few options:
- Solvent-based cleaning: Instead of using soap and water, you can use a solvent such as odorless mineral spirits or turpentine to clean your brushes. Follow the manufacturer’s instructions and use these solvents in a well-ventilated area.
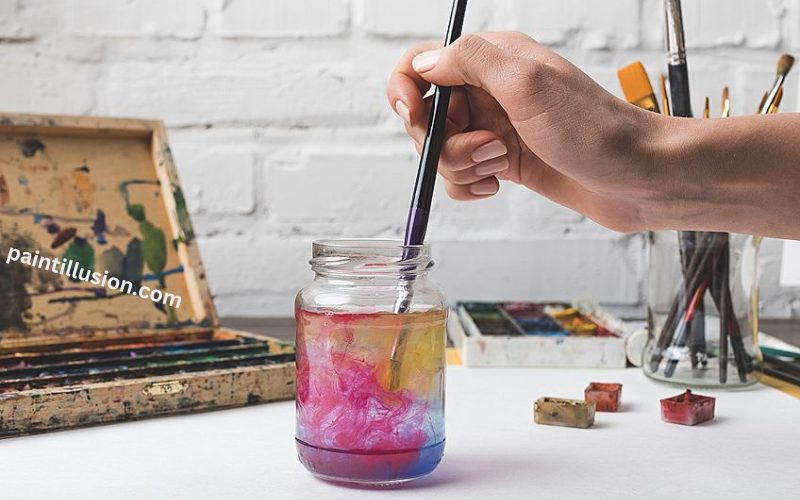
- Brush cleaning jars: Brush cleaning jars are specially designed containers that allow you to clean your brushes by swirling them in the liquid inside. This method can be more convenient and less messy than using a sink or basin.
- Brush cleaning mats: Brush cleaning mats are textured mats that help remove paint from the bristles. Simply rub your brushes against the mat while applying gentle pressure to loosen the paint.
Remember to always follow safety guidelines and dispose of solvents properly when using alternative cleaning methods.
How to Properly Store Oil Paint Brushes After Rinsing
Once you have rinsed and dried your oil paint brushes, it is important to store them properly to maintain their shape and quality. Here’s how to do it:
- Lay your brushes flat on a clean cloth or paper towels. Make sure the bristles are fully extended and not touching each other.
- If you prefer storing your brushes upright, place them in a container with the bristles facing upward. Make sure the bristles do not touch the bottom of the container.
- Avoid storing your brushes in airtight containers or sealed bags, as it can lead to mold or mildew growth. Allow air to circulate around the bristles to prevent moisture buildup.
- If you have multiple brushes, consider using a brush holder or roll-up case to keep them organized and protected. These storage options also help prevent bristle deformation.
By following these storage tips, you can ensure that your oil paint brushes remain in excellent condition and ready to use whenever inspiration strikes.
Recommended Products for Rinsing Oil Paint Brushes
While basic materials like mild soap and warm water work well for rinsing oil paint brushes, there are some specialized products available that can enhance the cleaning process. Here are a few recommended products:
- Masters Brush Cleaner and Preserver: This product is specifically designed for cleaning and preserving brushes. It effectively removes paint residue and conditions the bristles, extending their lifespan.
- Winsor & Newton Brush Cleaner and Restorer: This brush cleaner is suitable for both oil and acrylic brushes. It helps remove dried and hardened paint, restoring the bristles to their original form.
- Brush spinners or brush spinner attachments: These tools can be attached to a power drill and help remove excess water from your brushes, speeding up the drying process.
Remember to read the instructions and reviews before purchasing any products and choose the ones that best suit your needs and preferences.
FAQs about Rinsing Oil Paint Brushes
- Can I reuse the water used for rinsing my oil paint brushes? It is not recommended to reuse the water, as it may contain paint particles or solvents that can contaminate your fresh paint. Always use clean water for rinsing.
- How often should I clean my oil paint brushes? Ideally, you should clean your brushes after each painting session. However, if you are working on a long-term project, you can store your brushes in a jar filled with a brush cleaner or solvent to prevent the paint from drying on the bristles.
- Can I use the same cleaning method for synthetic and natural hair brushes? Yes, the cleaning process is the same for both types of brushes. However, be sure to use the appropriate cleaning agents and solvents recommended for each type of bristle.
- What should I do if my brush bristles are stained or discolored? Stains or discoloration on bristles can be challenging to remove completely. However, regular cleaning and conditioning with brush cleaners can help minimize discoloration.
- Can I use dish soap or hand soap to clean my oil paint brushes? While dish soap or hand soap can be used in a pinch, it is best to use mild liquid soap or brush cleaners specifically formulated for oil paint brushes. These products are designed to effectively remove oil paint without damaging the bristles.
Conclusion
Properly rinsing oil paint brushes is crucial for maintaining their quality and longevity. By following the step-by-step guide, using the right materials, and avoiding common mistakes, you can ensure that your brushes remain in optimal condition for years to come. Remember to store your brushes properly and consider using recommended products to enhance the cleaning process. With these techniques and tips, you can enjoy the process of painting with oil and keep your brushes in pristine condition. Happy painting!
CTA: If you found this guide helpful, explore our website for more tips and tricks on oil painting techniques and supplies.